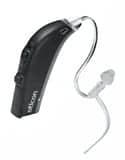
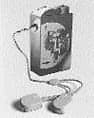
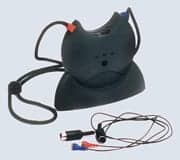
Issue StoriesHow to Verify Directional Hearing Aids in the Officeby George J. Frye A tutorial on verifying the operational performance of a directional system. The microphones used in directional hearing aids are delicate, and they are subject to daily wear and tear. It is quite easy for things to happen to these aids that cause the directional features to degrade or even to disappear. It also has been noted that new aidsdirect from the factorymay have defective microphones, resulting in improper operation. Testing is therefore useful and recommended for all directional fittings, as this can alert the dispensing professional to a problem and reduce user dissatisfaction. A relatively new ANSI standard (S3.35-2004) has been published that describes the requirements for a thorough test of the directional characteristics of a KEMAR-mounted hearing aid. This standard requires the use of sophisticated test equipment (typically found only in research labs) and provides an elaborate procedure to determine the aids directional patterns and figures of merit. The reader should understand that the procedures suggested in this basic primer in no way attempt to fully classify the performance of a directional aid to this ANSI standard. On the other hand, the procedures recommended here do demonstrate whether or not the directional system of the hearing aid is operational. To measure directional performance, you can compare the response of the hearing aid when the signal source is in front of the patient (eg, the forward response) with the response of the hearing aid when the source is behind the patient (eg, the reverse response). You can determine these responses with either coupler or real-ear measurements. The following are techniques you can use on any Frye FONIX analyzer. Assessing Directional Systems Using Coupler Measurements Coupler Measurements: Method 1 Set-up for large FONIX chambers. Except for the 6500CX analyzer (as noted above), select Coupler, Multicurve Test mode. The 6500CX normally operates in coupler mode. Select Curve 1. (With the 6500 CX, curve switching is automatic.)
The speaker in our large sound chambers is positioned on the right side of the chamber at a 45º angle (Figure 1). It is important to keep the physical structure of the hearing instrument in mind when positioning the directional aid for measurements. The first step is to locate and align the directional microphones. The directional aid typically has two microphones; one in front and one in the rear. The front microphone is the one that is placed at the reference point in the chamber. The body of the hearing aid is then positioned so that the rear microphone is oriented to enhance or to reject the sound coming from the chamber speaker.
Forward measurement (Figure 2). To measure the response of the hearin 2. Take the forward measurement. Each FONIX analyzer has an operational mode for individual coupler measurements, and each mode has a CRT display (eg, a screen). Use the coupler screen to take the measurement. We recommend using a Composite or Digital Speech signal, if it is available. Typically this measurement should be done with a signal level that is above the noise floor of the testing environment, but below the compression kneepoint of the aid. A 50 dBSPL source is a good choice. Signal averaging may be used to reduce the effects of room noise on the measurement. Reverse measurement (Figure 3). To measure the response of the hearing aid when the signal is coming from behind the patient:
2. Take the reverse measurement. Use the same source type and level as you used for the forward measurement. With the exception of the 6500 CX, the curves can automatically be displayed in multi curve mode. For the 6500 CX, go to multi curve mode to display the two measured curves. It is also possible with the 6500 CX multi curve mode to display the difference between the two curves by subtracting one from the other. Coupler Measurements: Method 2
Set-up for smaller FONIX chambers. The hearing aid, connected to the coupler, is positioned in front of the speaker on a stand (Figure 4). Alternatively, the operator can stand to the side of the sound field and hold the aid at a fixed distance (6-12 inches works well) from the speaker. A distance larger than 12 inches will allow acoustic reflections to play a greater roll and will degrade the directional response. 1. Set up your analyzer so that the speaker is in the upright position. See your operators manual for details.
Forward measurement (Figure 5). To measure the forward response of the hearing aid: 2. Take the forward measurement. Ideally, this measurement should be done at a signal level above the noise floor of the testing environment, but below the compression kneepoint of the aid. If you have a quiet testing environment, use 50 dB SPL. Noisier testing environments may require you to use a higher source level to get a good measurement. Signal averaging may also be used to reduce the effects of noise on the measurement.
Reverse measurement (Figure 6). To measure the reverse response of the hearing aid: 2. Take the reverse measurement. Use the same source type and level as you used for the forward measurement.
Figure 7 shows typical responses from a directional aid. Note the significant difference between the forward (Curve 1) and the reverse gains (Curve 2) of the hearing aid. These curves were taken with a FP35 analyzer, and also show the response of this particular aid when switched to omnidirectional mode. Curve 3 is the omni directional gain response. Assessing Directional Systems Using Real-Ear Measurements Basic set-up. All you need is a swivel chair to turn the client around during testing, or an external speaker on a swing arm to move the speaker around the client. The use of the real-ear program gives the advantage of curve-smoothing and the automatic display of the directional advantage. As with the coupler measurements, we need to compare a forward versus reverse response difference, so we are going to designate REUR (unaided) and REAR (aided) for these responses. For the purpose of this discussion, we are going to treat the forward measurement as the REUR measurement and the reverse measurement as the REAR (aided) measurement. (The reverse could also be done; you just need to remember which is which!) Set up the analyzer as you would for any real-ear measurement. Place the reference microphone above the clients ear using the real-ear ear-hook accessory (this accessory is used for leveling the sound field). Use a 0º azimuth positioning when you level the sound-field speaker, and use the Real-Ear Menu to set the reference microphone to Off for these measurements. Select the source level. This level should be low enough so that it is below the hearing aids compression kneepoint, but high enough so that the measurement is performed above the noise level in the room. Usually a signal level of 50 dB SPL is preferable, although you may have to use a louder signal in a noisy test environment. Place the real-ear hook on the ear to be tested and place the hearing aid on the ear with reference and probe microphones. Select Composite or Digital Speech source signal if available. Otherwise, select the Fast (continuous) pure-tone sweep.
Forward measurement (Figure 8). To measure the forward real-ear response of the hearing aid:
Reverse measurement (Figure 9). To measure the reverse real-ear response of the hearing aid: 2. Set up the analyzer to perform an aided (REAR) measurement in the real-ear insertion gain screen. 3. Perform the reverse measurement. While the signal is running, you can adjust the angle of the speaker by moving the speaker or rotating the patient in order to determine the null spot of the directional aid. Look for the angle at which the response curve provides the least amount of amplification. 4. Stop the measurement when satisfied.
A sample set of curves from a directional aid measurement on a KEMAR manikin are shown in Figures 10a and 10b. Figure 10a shows the real-ear aided gain responses for forward and reverse positions of a KEMAR. Figure 10b shows the difference between the two measured responses. Some Important Notes on Directional Aid Testing AGC action. Many aids are now equipped with automatic gain control. When a hearing aid is operating with an active AGC system, the differences between the forward and reverse gains can be reduced. The AGC function acts as if it wants to keep the sound intensity level constant. The directional feature causes the hearing aid amplifier to see lower levels of sound when it is coming from the reverse direction. Fortunately, AGC action is usually limited so that there is a measurable difference for incoming sound intensities. Noise reduction. Some modern digital aids have a feature that reduces the gain of the system when a steady state signal is encountered. The use of the digital speech signal will often reduce this noise reduction action. Acoustic reflections. This factor is probably the most difficult to resolve. In coupler mode, reflections must be controlled to make a valid test. Why are they important? There typically is no problem is getting a good test of the forward response of a hearing aid. But reflections in the environment make it more difficult in the reverse direction. If a hearing aid is pointed away from the sound source, the directional action should reduce the incident sound intensity. But if the environment has a surface close to the hearing aid from which the sound can reflect, then this reflected sound may come from a direction that the hearing aid is eager to amplify. Reflections are difficult to control in small sound boxes. Larger boxes can incorporate damping material to reduce reflections and therefore allow a better measurement to be made. In real-ear mode, the procedure outlined supports close spacing between the sound source speaker and the tested aid. A real advantage of this close placement is that, while reflections may be present, they will be of a lower intensity as compared with the incident sound. Summary Acknowledgements
|
|
|
Featured Jobs
Find a Job |
ADDITIONAL ONLINE RESOURCES |
Featured Employer
|