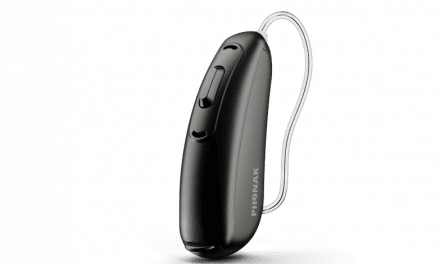
The microphones used in directional hearing aids are delicate, and they are subject to daily wear and tear. It is quite easy for things to happen to these aids that cause the directional features to degrade or even to disappear. It also has been noted that new aids—direct from the factory—may have defective microphones, resulting in improper operation. Testing is therefore useful and recommended for all directional fittings, as this can alert the dispensing professional to a problem and reduce user dissatisfaction.
A relatively new ANSI standard (S3.35-2004) has been published that describes the requirements for a thorough test of the directional characteristics of a KEMAR-mounted hearing aid. This standard requires the use of sophisticated test equipment (typically found only in research labs) and provides an elaborate procedure to determine the aid’s directional patterns and figures of merit. The reader should understand that the procedures suggested in this basic primer in no way attempt to fully classify the performance of a directional aid to this ANSI standard. On the other hand, the procedures recommended here do demonstrate whether or not the directional system of the hearing aid is operational.
To measure directional performance, you can compare the response of the hearing aid when the signal source is in front of the patient (eg, the “forward response”) with the response of the hearing aid when the source is behind the patient (eg, the “reverse response”). You can determine these responses with either coupler or real-ear measurements. The following are techniques you can use on any Frye FONIX analyzer.
Assessing Directional Systems Using Coupler Measurements
When testing a directional aid in the sound chamber, it is important to position the aid correctly in order to test the forward and reverse responses. After the measurements have been completed, compare the forward and reverse responses. (Note: If you have the 6500CX, you can use the Multi-Curve function to subtract the reverse curve from the forward curve to determine the exact directional benefit.)
Coupler Measurements: Method 1
Practically any analyzer with a coupler mode can be used for testing directional aids. The following notes especially apply, however, to the 6500CX, 7000, FP35 and FP40 analyzers. We recommend the following method for analyzers equipped with a FONIX 6010, 6020, 6040, or 7020 sound chamber:
Set-up for large FONIX chambers. Except for the 6500CX analyzer (as noted above), select “Coupler, Multicurve Test” mode. The 6500CX normally operates in coupler mode. Select “Curve 1.” (With the 6500 CX, curve switching is automatic.)

The speaker in our large sound chambers is positioned on the right side of the chamber at a 45º angle (Figure 1). It is important to keep the physical structure of the hearing instrument in mind when positioning the directional aid for measurements. The first step is to locate and align the directional microphones. The directional aid typically has two microphones; one in front and one in the rear. The front microphone is the one that is placed at the reference point in the chamber. The body of the hearing aid is then positioned so that the rear microphone is oriented to enhance or to reject the sound coming from the chamber speaker.


FIGURE 2a-b. Top: Forward measurement position of the 6050 or 7020 sound chambers. Bottom: Forward measurement position of the 6020 and 6040 sound chambers. |
Forward measurement (Figure 2). To measure the response of the hearin
1. Position the hearing aid so that it is faced towards the sound chamber speaker. If you have a sound chamber with a flat mounting surface (6050 or 7020), you can usually just lay the hearing aid in the box as shown in Figure 2a. If you have a sound chamber with a recessed basket (6020 or 6040), position the aid as shown in Figure 2b. It may be necessary to use some FUN-TAK to accomplish this. Close the sound chamber lid when ready to test.
2. Take the forward measurement. Each FONIX analyzer has an operational mode for individual coupler measurements, and each mode has a CRT display (eg, a “screen”). Use the coupler screen to take the measurement. We recommend using a “Composite” or “Digital Speech” signal, if it is available. Typically this measurement should be done with a signal level that is above the noise floor of the testing environment, but below the compression kneepoint of the aid. A 50 dBSPL source is a good choice. Signal averaging may be used to reduce the effects of room noise on the measurement.
Reverse measurement (Figure 3). To measure the response of the hearing aid when the signal is coming from behind the patient:
1. Select “Curve 2.” Position the hearing aid so that it faces away from the sound chamber speaker. Different hearing aids have different null points, so you will want to adjust the positioning so that the sound chamber speaker is pointing towards what should be the null point of the directional aid. See Figures 3a and 3b for placements in the two larger sound chamber types. Close the sound chamber lid when finished.


FIGURE 3a-b. Left: Reverse measurement in 6050 sound chamber. Right: Reverse measurement in 6020 sound chamber. |
2. Take the reverse measurement. Use the same source type and level as you used for the forward measurement.
With the exception of the 6500 CX, the curves can automatically be displayed in multi curve mode. For the 6500 CX, go to multi curve mode to display the two measured curves. It is also possible with the 6500 CX multi curve mode to display the difference between the two curves by subtracting one from the other.
Coupler Measurements: Method 2
You can also use the built-in sound chamber of the FP40 or FP35 analyzer to verify directionality in hearing instruments. Since these two analyzers have small sound chambers, directional testing is best done with the chamber in the upright position that is usually associated with real-ear measurements.

Set-up for smaller FONIX chambers. The hearing aid, connected to the coupler, is positioned in front of the speaker on a stand (Figure 4). Alternatively, the operator can stand to the side of the sound field and hold the aid at a fixed distance (6-12 inches works well) from the speaker. A distance larger than 12 inches will allow acoustic reflections to play a greater roll and will degrade the directional response.
1. Set up your analyzer so that the speaker is in the upright position. See your operator’s manual for details.
2. If you are going to use a stand, position it at this time.
3. Use Fun-Tak to affix the large measurement microphone to the stand. Use a distance of 6-12 inches from the speaker while standing off to the side (Figure 4).
4. Push the “Level” button on your analyzer from the coupler measurement screen. This will level the sound field.
5. Attach the hearing aid to the coupler and insert the measurement microphone.

Forward measurement (Figure 5). To measure the forward response of the hearing aid:
1. Position the hearing aid on the stand so that it is facing forward, aligning the microphone ports as mentioned above. Use Fun-Tak to hold the assembly in place. Alternately, hold the hearing aid in place while standing to the side of the sound-field speaker.
2. Take the forward measurement. Ideally, this measurement should be done at a signal level above the noise floor of the testing environment, but below the compression kneepoint of the aid. If you have a quiet testing environment, use 50 dB SPL. Noisier testing environments may require you to use a higher source level to get a good measurement. Signal averaging may also be used to reduce the effects of noise on the measurement.

Reverse measurement (Figure 6). To measure the reverse response of the hearing aid:
1. Rotate the hearing aid so that it is faced away from the sound-field speaker. Different hearing aids have different directional null points. With the use of the composite or digital speech signal, the real-time nature of the measurement makes it possible to adjust the positioning for the greatest signal rejection. Make sure the front microphone of the aid is the same distance from the speaker that you used for the forward measurement.
2. Take the reverse measurement. Use the same source type and level as you used for the forward measurement.

Figure 7 shows typical responses from a directional aid. Note the significant difference between the forward (Curve 1) and the reverse gains (Curve 2) of the hearing aid. These curves were taken with a FP35 analyzer, and also show the response of this particular aid when switched to omnidirectional mode. Curve 3 is the omni directional gain response.
Assessing Directional Systems Using Real-Ear Measurements
Perhaps the most realistic way to test directionality is with real-ear measurements. You can use the “Insertion Gain” screen on any FONIX analyzer to show you the forward and reverse responses, as well as a curve showing the directional advantage—which is the difference between the forward and reverse responses.
Basic set-up. All you need is a swivel chair to turn the client around during testing, or an external speaker on a swing arm to move the speaker around the client. The use of the real-ear program gives the advantage of curve-smoothing and the automatic display of the directional advantage.
As with the coupler measurements, we need to compare a forward versus reverse response difference, so we are going to designate REUR (unaided) and REAR (aided) for these responses. For the purpose of this discussion, we are going to treat the forward measurement as the “REUR” measurement and the reverse measurement as the “REAR (aided)” measurement. (The reverse could also be done; you just need to remember which is which!)
Set up the analyzer as you would for any real-ear measurement. Place the reference microphone above the client’s ear using the real-ear ear-hook accessory (this accessory is used for leveling the sound field). Use a 0º azimuth positioning when you level the sound-field speaker, and use the “Real-Ear Menu” to set the reference microphone to “Off” for these measurements.
Select the source level. This level should be low enough so that it is below the hearing aid’s compression kneepoint, but high enough so that the measurement is performed above the noise level in the room. Usually a signal level of 50 dB SPL is preferable, although you may have to use a louder signal in a noisy test environment. Place the real-ear hook on the ear to be tested and place the hearing aid on the ear with reference and probe microphones. Select “Composite” or “Digital Speech” source signal if available. Otherwise, select the “Fast” (continuous) pure-tone sweep.

Forward measurement (Figure 8). To measure the forward real-ear response of the hearing aid:
1. Rotate the patient or the speaker so that the speaker is positioned at a 0º-20° azimuth for the forward measurement.
2. Level the system (see above).
3. Set up the analyzer to perform an “unaided” (REUR) measurement in the real-ear insertion gain screen. Although this measurement will be done while the patient is wearing the hearing aid, the analyzer does not need to know this!
4. Take the forward measurement.

Reverse measurement (Figure 9). To measure the reverse real-ear response of the hearing aid:
1. Turn the patient around so the speaker is pointing at the null spot of the directional aid. For some hearing aids this is 180º. Other hearing aids may have the null at a different angle. Alternately, if you are using an external speaker on a swing arm, move the speaker around the patient.
2. Set up the analyzer to perform an “aided” (REAR) measurement in the real-ear insertion gain screen.
3. Perform the reverse measurement. While the signal is running, you can adjust the angle of the speaker by moving the speaker or rotating the patient in order to determine the null spot of the directional aid. Look for the angle at which the response curve provides the least amount of amplification.
4. Stop the measurement when satisfied.


|
| FIGURE 10a-b. Directional measurement using the real-ear mode. |
A sample set of curves from a directional aid measurement on a KEMAR manikin are shown in Figures 10a and 10b. Figure 10a shows the real-ear aided gain responses for forward and reverse positions of a KEMAR. Figure 10b shows the difference between the two measured responses.
Some Important Notes on Directional Aid Testing
A number of factors come into play when attempting to test directional hearing aids. Three are listed below.
AGC action. Many aids are now equipped with automatic gain control. When a hearing aid is operating with an active AGC system, the differences between the forward and reverse gains can be reduced. The AGC function acts as if it wants to keep the sound intensity level constant. The directional feature causes the hearing aid amplifier to see lower levels of sound when it is coming from the reverse direction. Fortunately, AGC action is usually limited so that there is a measurable difference for incoming sound intensities.
Noise reduction. Some modern digital aids have a feature that reduces the gain of the system when a steady state signal is encountered. The use of the digital speech signal will often reduce this noise reduction action.
Acoustic reflections. This factor is probably the most difficult to resolve. In coupler mode, reflections must be controlled to make a valid test. Why are they important? There typically is no problem is getting a good test of the forward response of a hearing aid. But reflections in the environment make it more difficult in the reverse direction.
If a hearing aid is pointed away from the sound source, the directional action should reduce the incident sound intensity. But if the environment has a surface close to the hearing aid from which the sound can reflect, then this reflected sound may come from a direction that the hearing aid is eager to amplify.
Reflections are difficult to control in small sound boxes. Larger boxes can incorporate damping material to reduce reflections and therefore allow a better measurement to be made. In real-ear mode, the procedure outlined supports close spacing between the sound source speaker and the tested aid. A real advantage of this close placement is that, while reflections may be present, they will be of a lower intensity as compared with the incident sound.
Summary
Although it is extremely difficult (or impossible) to make precise measures of directional performance in an office or clinic without specialized equipment, the procedures outlined in this article allow dispensing professionals to verify directional performance before fitting a patient with a directional hearing instrument. This testing is important because a significant percentage of directional systems have been found to be defective, and the integrity of the directional system is vital to patient satisfaction.
Acknowledgements
The author wishes to thank Alan Rose for his expertise in getting good pictures for the article. He also wishes to recognize Kristina Frye for the preparation of the FONIX directional testing handbook which served as the basis for this article.
| This article was submitted to HR by George J. Frye, an engineer and the president of Frye Electronics, Tigard, Ore. Correspondence can be addressed to George Frye, Frye Electronics Inc, PO Box 23391, Tigard, OR 97281; email: [email protected]. |